Set Up Manually
Manually Integrate the Navigation SDK
This guide explains how to manually integrate the AMAP Navigation SDK into your iOS project.
Before You Begin
Before you start, ensure you have created a new Single View Application project in Xcode.
If You Are Integrating the Navigation SDK for the First Time
Follow these steps to manually configure your project.
Step 1: Add Required Libraries
The Navigation SDK depends on the 3D Map SDK. To ensure proper functionality, you must also configure your API key using the Foundation SDK. The required libraries are listed below:
* Foundation SDK: AMapFoundationKit.framework
* System Frameworks:
* CoreMotion.framework (since 7.8.0)
* CoreLocation.framework
* GLKit.framework
* SystemConfiguration.framework
* CoreTelephony.framework
* CoreServices.framework (since 10.0.5)
* libiconv.tbd (since 11.1.000)
* CallKit.framework (since 11.1.000)
* Navigation SDK (includes 3D Map): AMapNaviKit.framework
> Important: If you are using Foundation SDK version 1.6.1 or later, please review the Foundation SDK documentation for important information regarding App Store submission.
To add the libraries:
1. Copy or drag the AMapNaviKit.framework file into your project folder.
2. In the Xcode project navigator, select your project name.
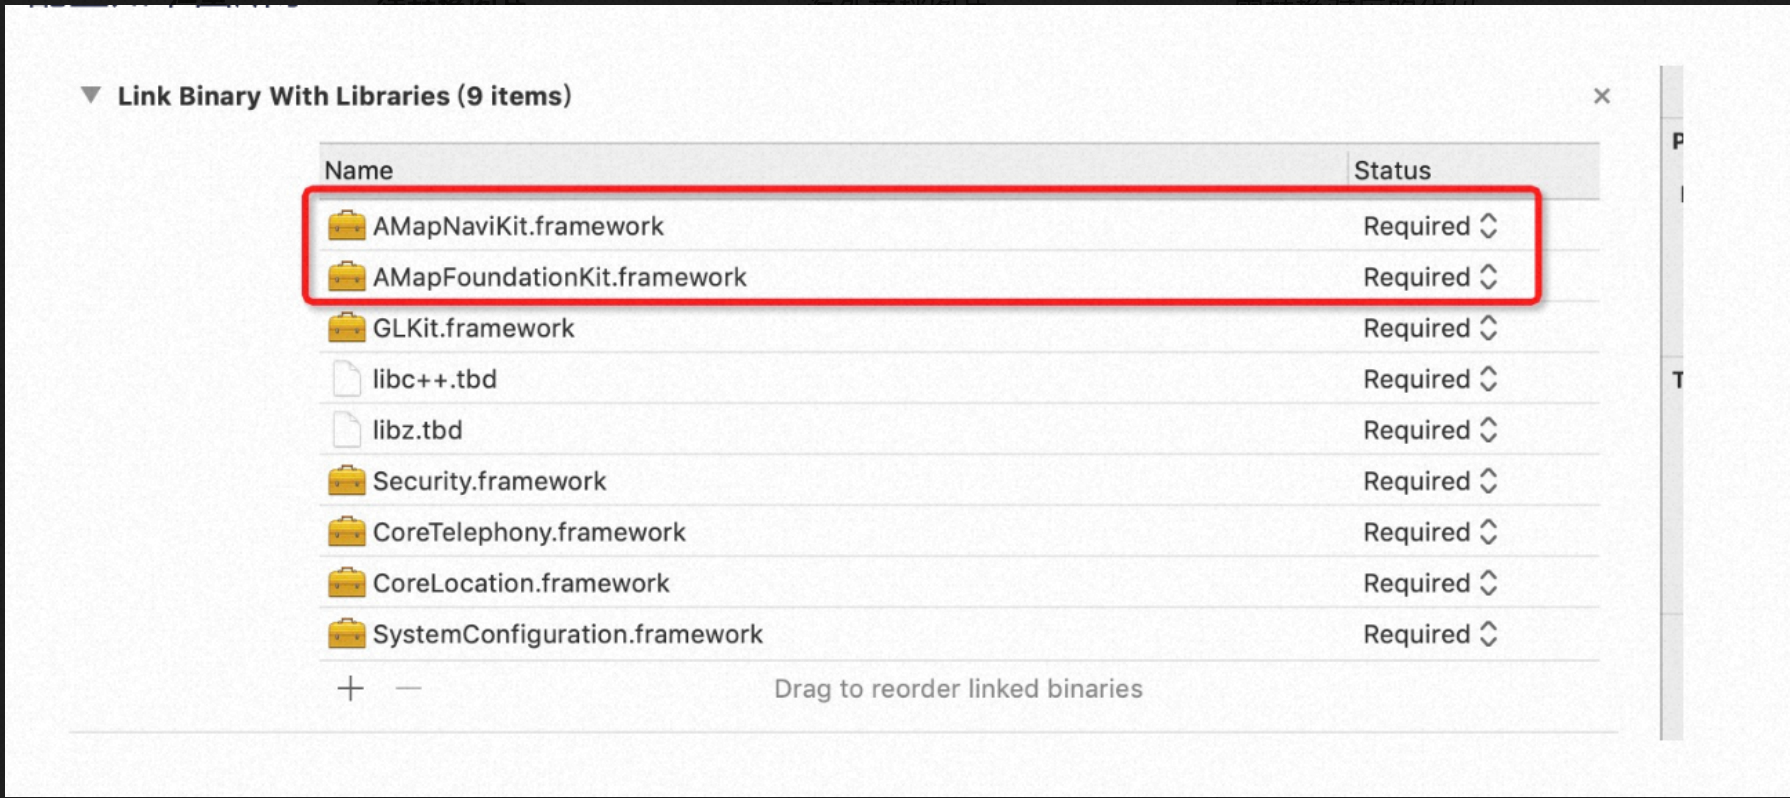
3. Go to TARGETS > Build Phases > Link Binary With Libraries.
4. Click the + button, then click Add Other....
5. Navigate to your project directory, select AMapNaviKit.framework, and click Open.
6. Repeat steps 4-5 to add AMapFoundationKit.framework.
The final configuration should look like this:
Notes:
* SystemConfiguration.framework, CoreTelephony.framework, and Security.framework are used for app statistics.
* libiconv.tbd is used for text encoding.
* CallKit.framework is used for internal voice prompt logic.
* To add system frameworks, follow the same steps above, but select the framework from the system library list instead of clicking Add Other....
* If you are upgrading from Xcode 9 to Xcode 10 or later, manually remove the libstdc++.6.0.9.tbd dependency, as it has been removed from Xcode 10.
Step 2: Add Required Resource Bundles
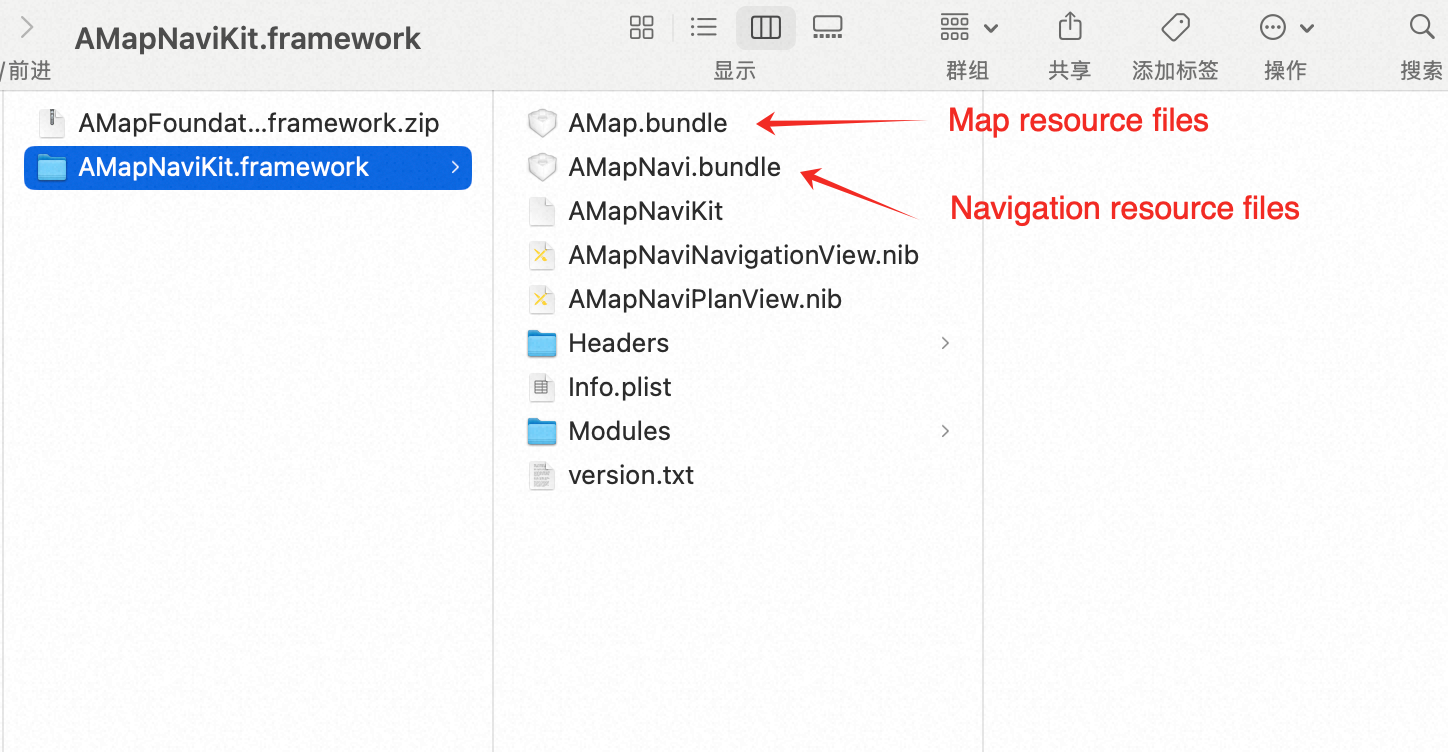
The Navigation SDK requires the following resource bundles, both located inside AMapNaviKit.framework:
* AMapNavi.bundle
* AMap.bundle
> Note: Because the Navigation SDK and Map SDK are combined into a single package, the map resources are also included in the Navigation SDK.
To add the resource bundles:
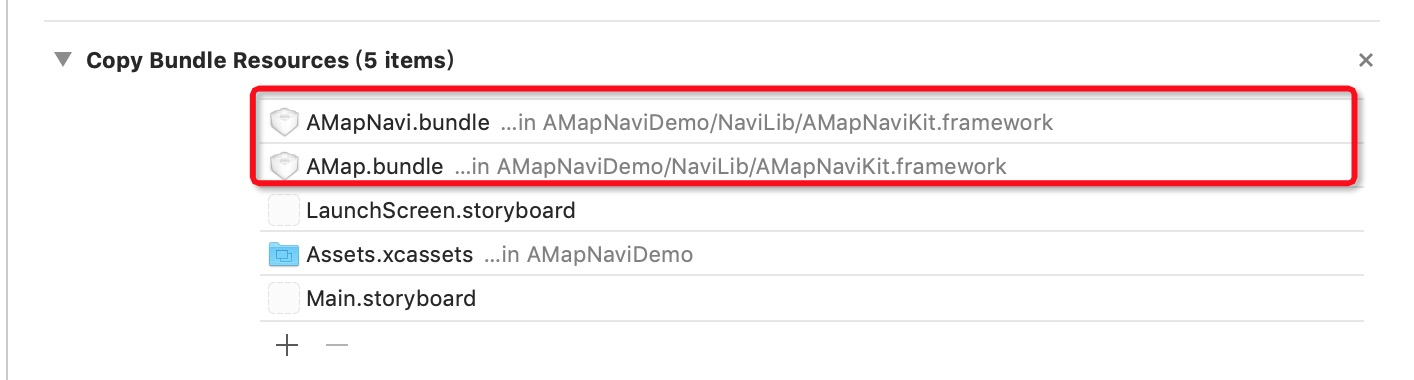
1. In Xcode, go to TARGETS > Build Phases > Copy Bundle Resources.
2. Click the + button, then click Add Other....
3. Navigate to the AMapNaviKit.framework package, select AMapNavi.bundle and AMap.bundle, and click Open.
Step 3: Configure the Info.plist File
* For location permission configuration, see the Location Permission Guide.
* For HTTPS configuration, see the HTTPS Solution Guide.
---
If You Have Previously Integrated the Navigation and Map SDKs
If your project already contains the Map SDK (MAMapKit.framework), follow these steps to upgrade to the combined Navigation SDK.
Step 1: Remove the Old Map SDK
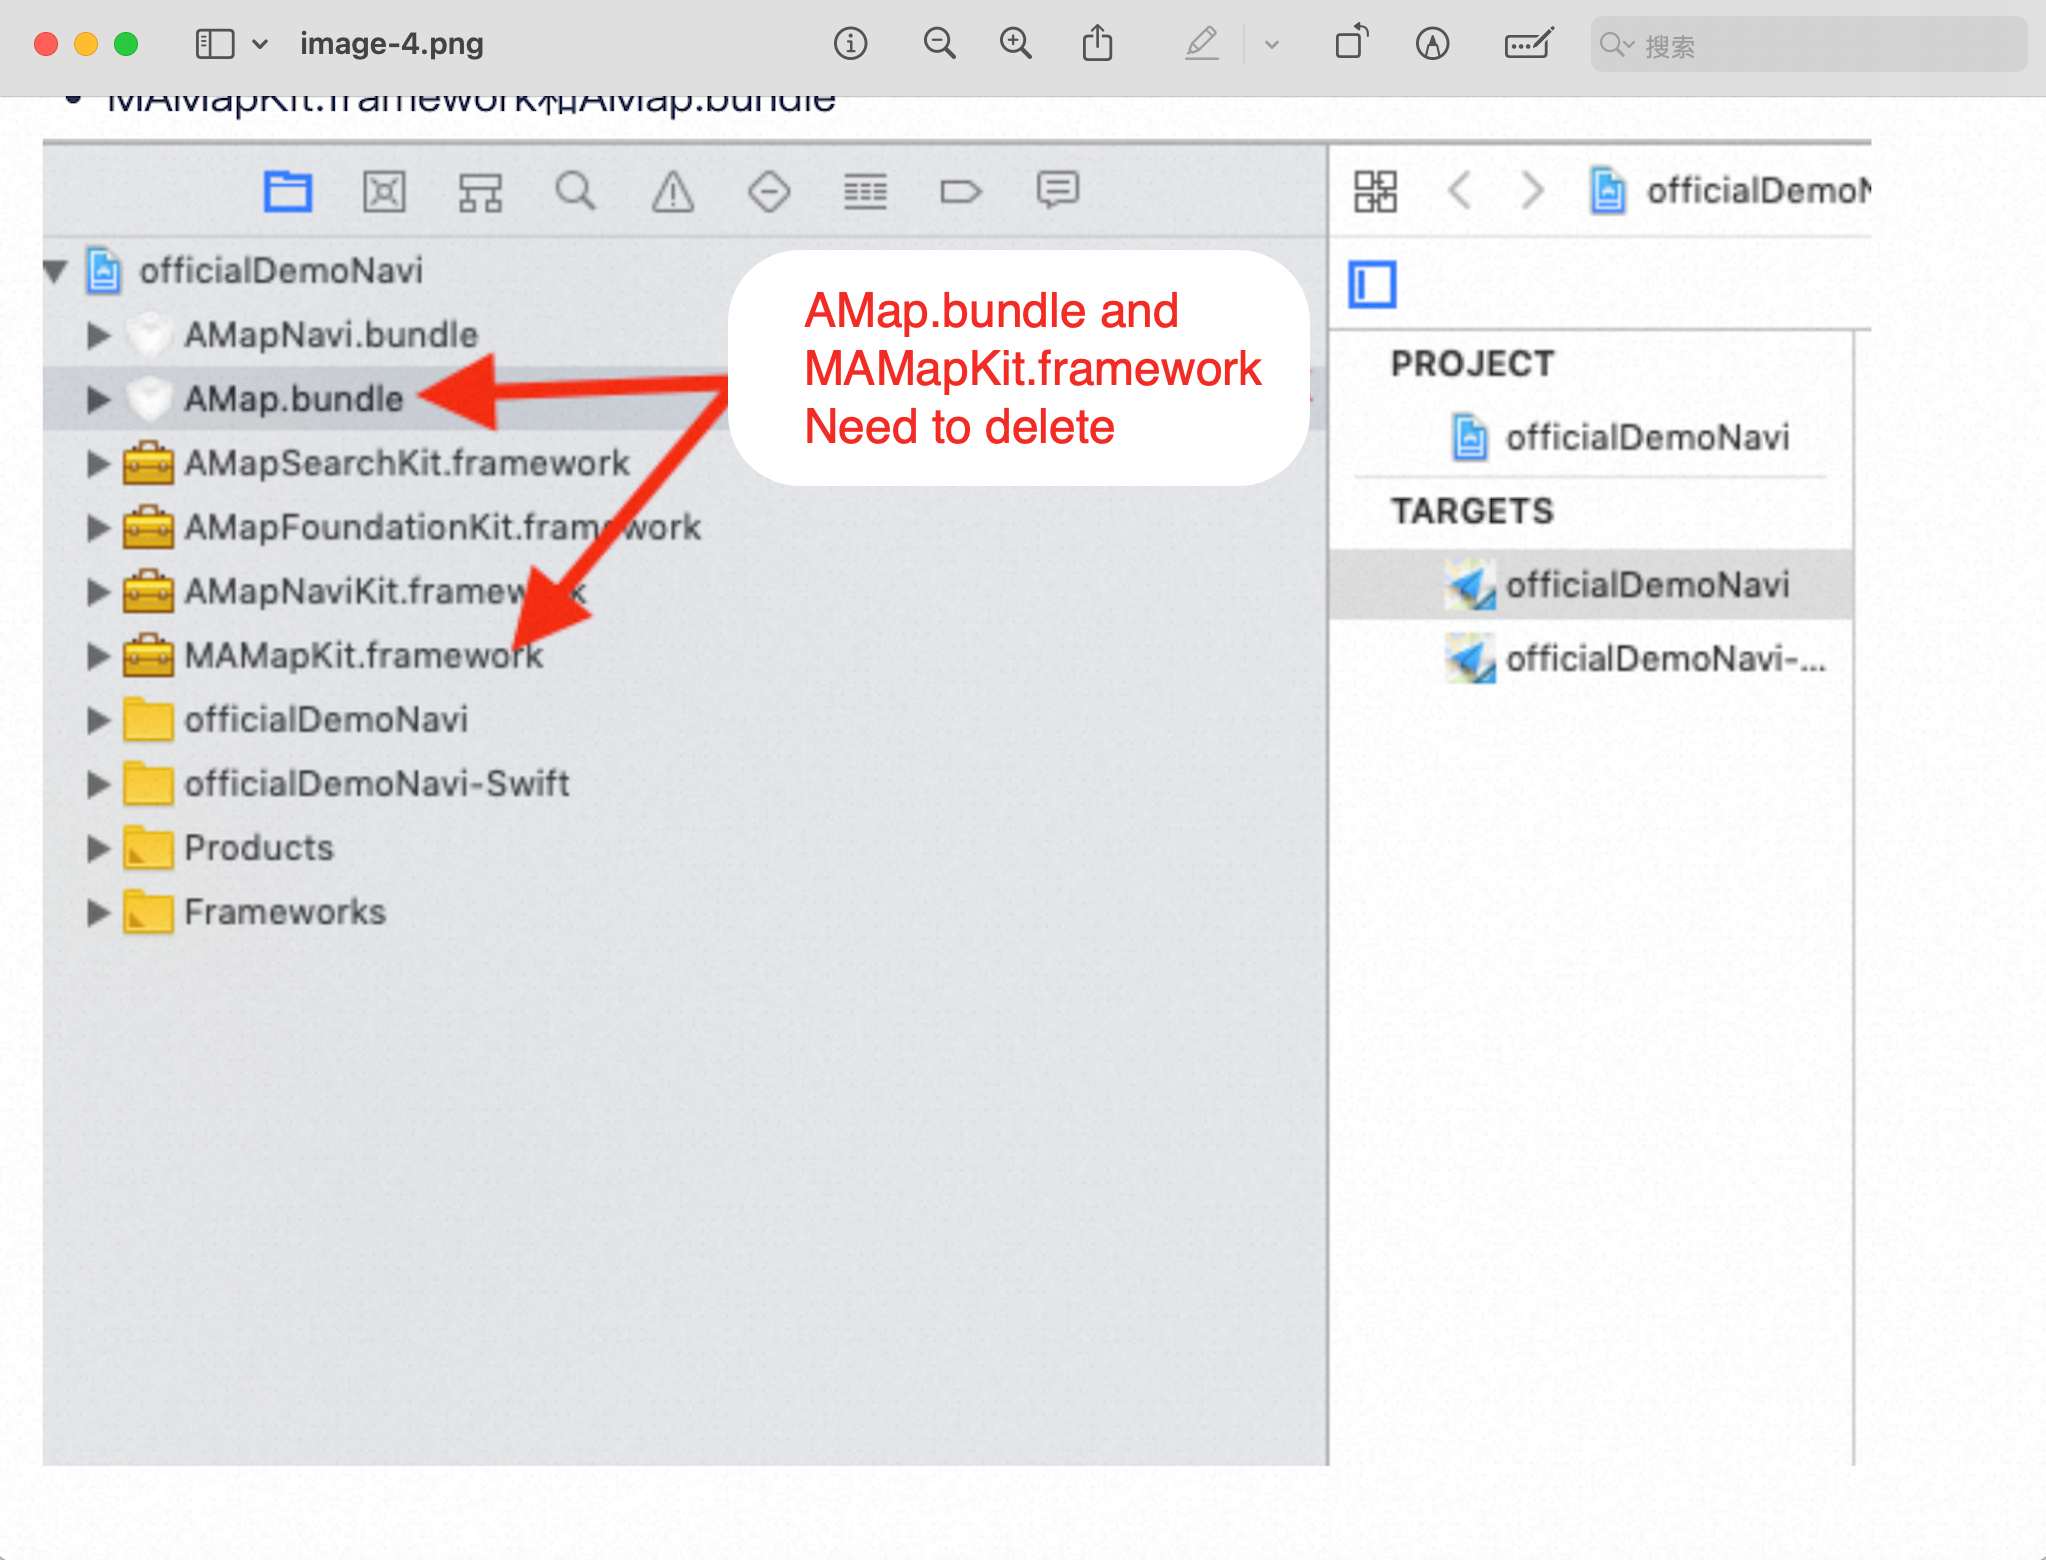
1. Delete the following files from your project:
* MAMapKit.framework
* AMap.bundle
Step 2: Re-add the Map Resource Bundle
1. Starting from Navigation SDK version 7.2.0, the map resource bundle (AMap.bundle) is included within AMapNaviKit.framework.
2. Go to TARGETS > Build Phases > Copy Bundle Resources.
3. Click the + button, then click Add Other....
4. Navigate to the AMapNaviKit.framework package, select AMap.bundle and AMapNavi.bundle, and click Open.
5. Perform a global search and replace in your project:
* Replace all occurrences of <MAMapKit/MAMapKit.h> with <AMapNaviKit/MAMapKit.h>.
---
Common Errors and Solutions (Version 7.2.0 and Later)
Error 1: `'MAMapKit/MAMapKit.h' file not found`
Solution: Replace all occurrences of <MAMapKit/MAMapKit.h> in your project with <AMapNaviKit/MAMapKit.h>.
Error 2: `ld: framework not found MAMapKit`
Solution: Remove -framework "MAMapKit" from the OTHER_LDFLAGS build setting.
* If you are using CocoaPods, remove it from the Pod's .xcconfig file.
* If you are using prelinking, remove it from the PRELINK_FLAGS setting.
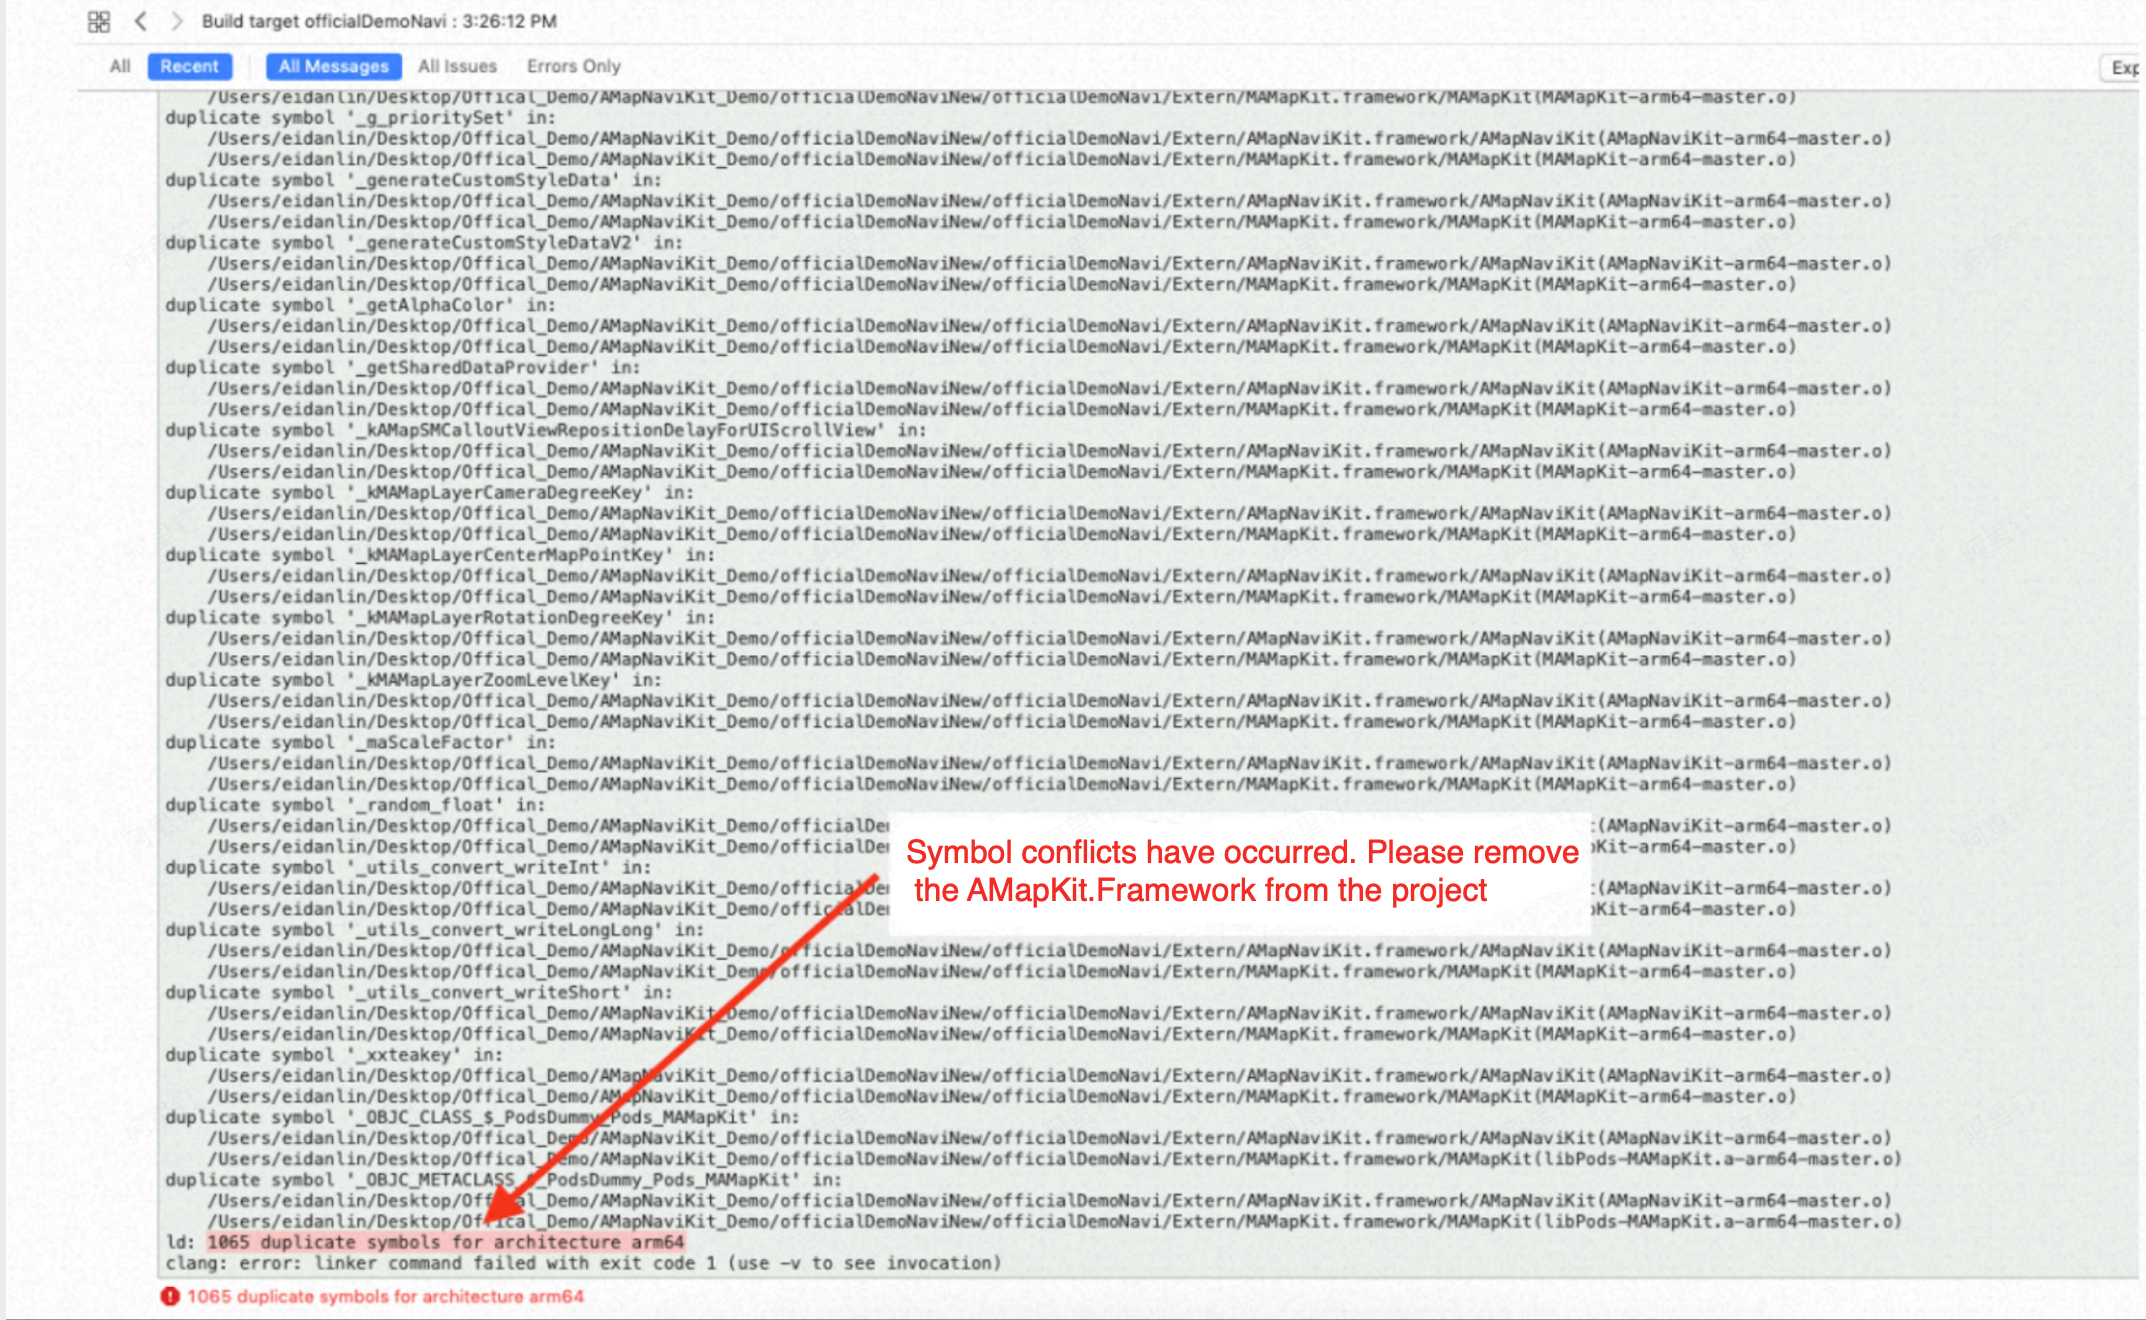
Error 3: Map symbol conflicts
Solution: Delete the old MAMapKit.framework from your project.
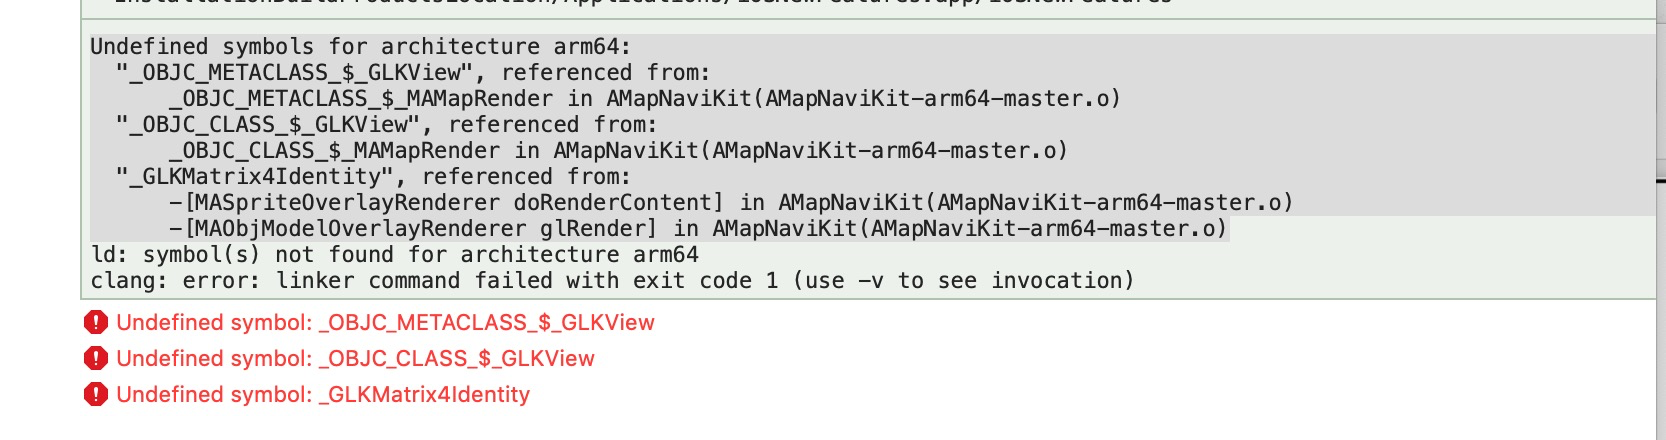
Error 4: `Undefined symbols for architecture arm64: "_OBJC_METACLASS_$_GLKView"`
Solution: Starting from version 7.2.0, the combined Navigation and Map SDK requires OpenGL. Add GLKit.framework to TARGETS > Build Phases > Link Binary With Libraries.