
Swift Guide
This guide walks you through creating a new iOS project using Swift, configuring the AMAP Navigation SDK, and setting up route planning and navigation.
Create a New Project
Create a new iOS project in Xcode.
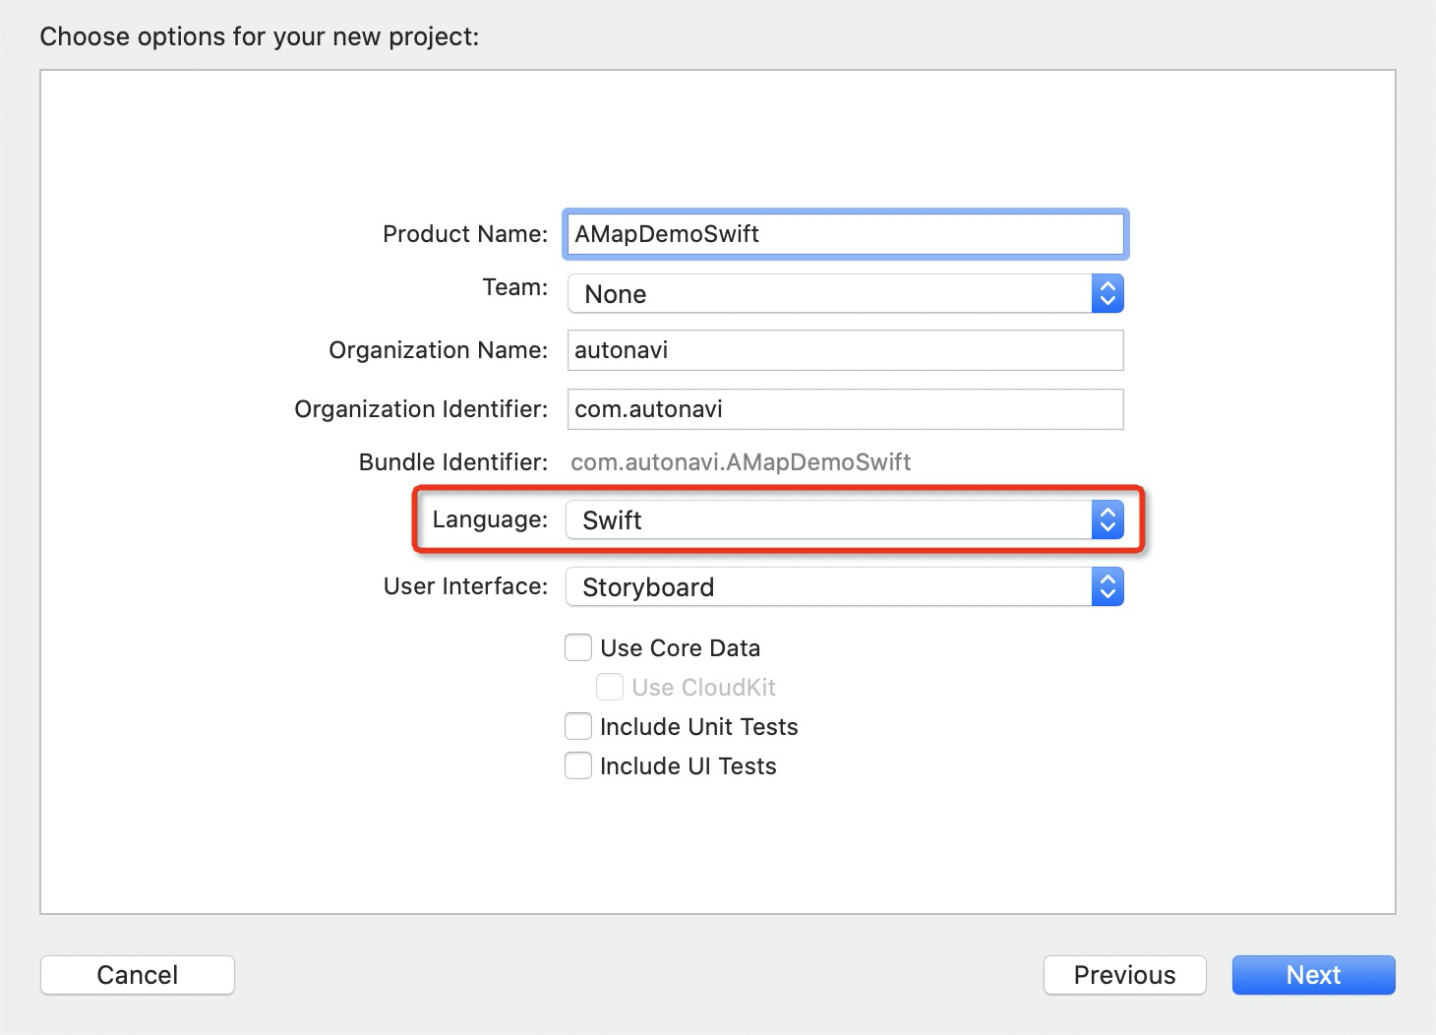
Configure the Project
Step 1: Integrate the SDK
Refer to the Automatic Deployment or Manual Deployment guide.
Step 2: Configure Swift Compilation
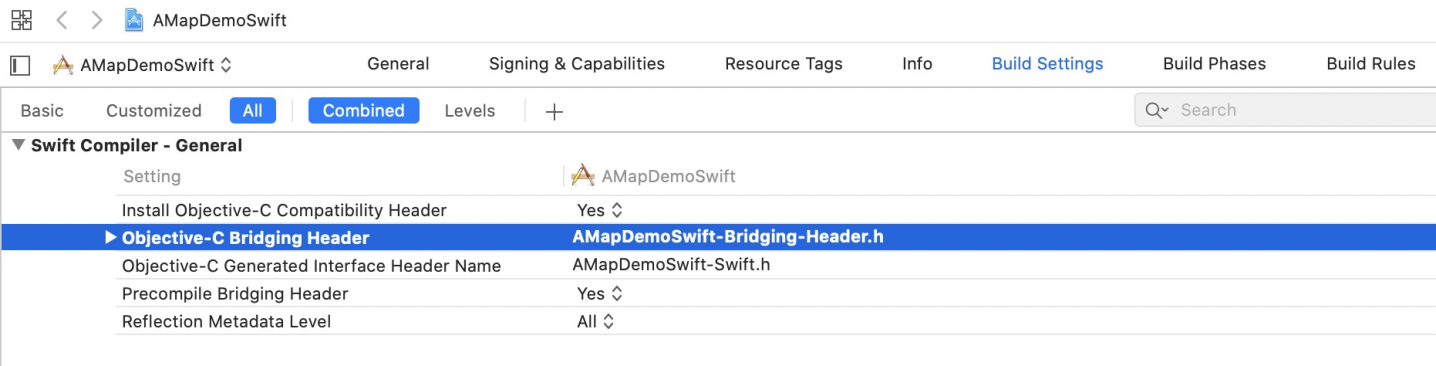
1. Create a bridging header file (place it in your project directory). Name it, for example, AMapDemoSwift-Bridging-Header.h. Import the required libraries in this header file:
#import <AMapNaviKit/AMapNaviKit.h>
#import <AMapNaviKit/MAMapKit.h>
#import <AMapFoundationKit/AMapFoundationKit.h>
2. In the Xcode project navigator, select your project. Go to TARGETS > Build Settings > Swift Compiler - Code Generation > Objective-C Bridging Header. Enter the path to your bridging header file.
Configure the API Key
In AppDelegate.swift, configure your AMAP API key at the beginning of the didFinishLaunchingWithOptions method.
func application(_ application: UIApplication, didFinishLaunchingWithOptions launchOptions: [UIApplicationLaunchOptionsKey: Any]?) -> Bool {
    AMapServices.shared().apiKey = APIKey
    // ...
}
Route Planning and Navigation
- For route planning, see the Driving Route Planning documentation.
- For navigation, see the Real-Time Navigation and Simulated Navigation documentation.