
Add Custom Elements
The AMAPNavi SDK allows you to customize the UI elements of the navigation interface, including both map-based overlays and widget controls. This applies to AMapNaviDriveView, AMapNaviWalkView, and AMapNaviRideView. The following documentation uses AMapNaviDriveView as an example.
The AMapNaviDriveView consists of two layers:
- Overlay layer (bottom): The map serves as a container for elements drawn by the SDK based on route information, such as the vehicle icon, start and end points, traffic routes, turn arrows, speed cameras, guide lines, and traffic lights.
- Widget layer (top): UI control elements such as junction views, light bar, overview button, and settings button.
For customizing annotations, see Custom Annotations. For customizing other overlays, see Custom Overlays. If the built-in customization options are insufficient, the SDK also provides methods to add custom annotations and overlays.
Add a Custom Annotation
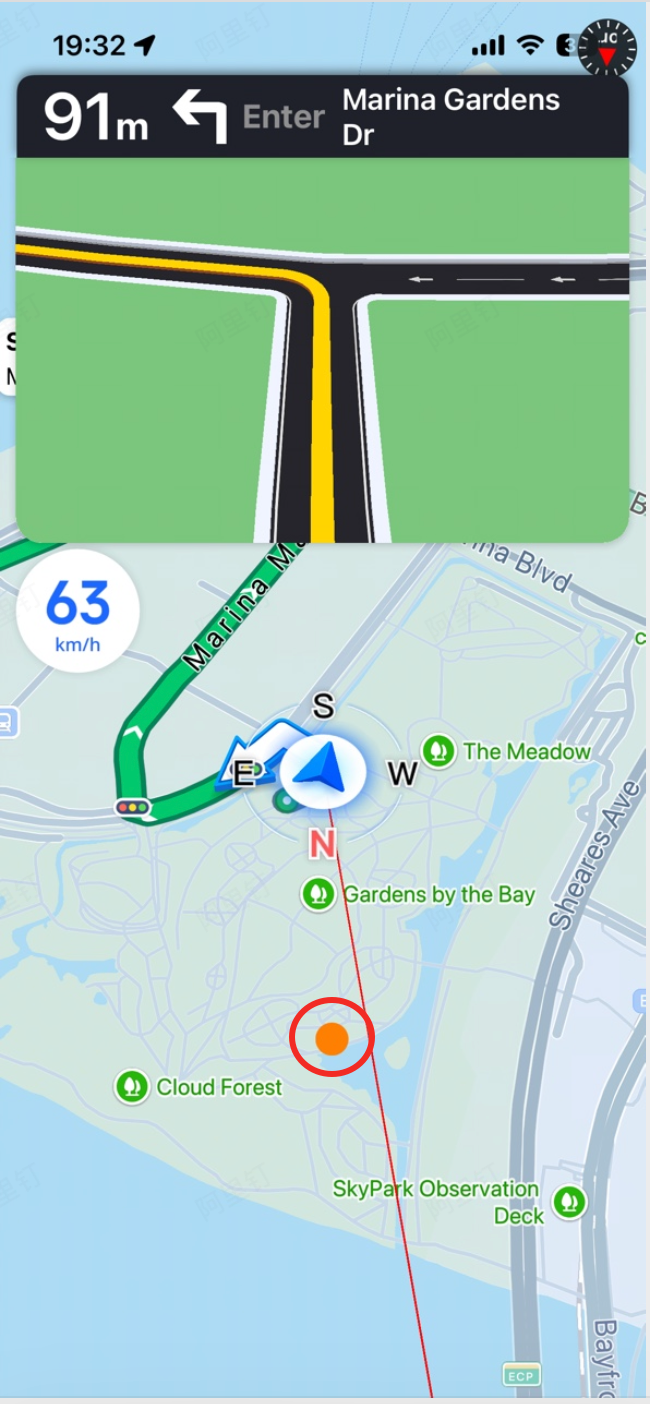
The image above shows an example of a custom annotation. Use the following APIs to add and remove custom annotations.
Unlike MAMapView, which requires returning an MAAnnotationView in the -mapView:viewForAnnotation: callback, AMapNaviDriveView requires you to create an AMapNaviCompositeCustomAnnotation object. Initialize this object using -initWithCoordinate:view:, passing in a UIView that serves as the annotation's visual representation.
/**
 * @brief Adds a custom annotation to the navigation map. (since 6.2.0)
 * @param annotation An AMapNaviCompositeCustomAnnotation object.
 */
- (void)addCustomAnnotation:(AMapNaviCompositeCustomAnnotation *)annotation;

/**
 * @brief Removes a custom annotation from the navigation map. (since 6.2.0)
 * @param annotation An AMapNaviCompositeCustomAnnotation object.
 */
- (void)removeCustomAnnotation:(AMapNaviCompositeCustomAnnotation *)annotation;
Usage Example
UIView *view = [[UIView alloc] initWithFrame:CGRectMake(0, 0, 20, 20)];
view.backgroundColor = [UIColor orangeColor];
view.clipsToBounds = YES;
view.layer.cornerRadius = view.bounds.size.width / 2;

AMapNaviCompositeCustomAnnotation *annotation = [[AMapNaviCompositeCustomAnnotation alloc] initWithCoordinate:CLLocationCoordinate2DMake(39.916134,116.489941) view:view];
[self.driveView addCustomAnnotation:annotation];
Add a Custom Overlay
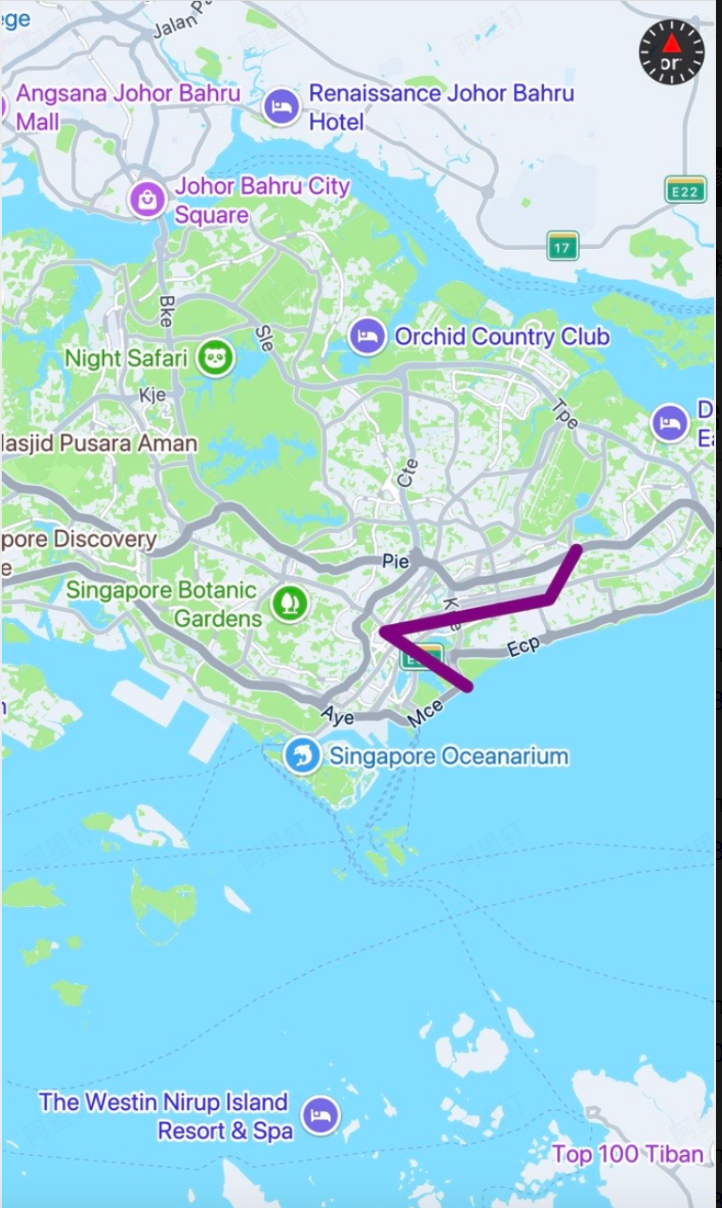
The image above shows an example of a custom overlay. Use the following APIs to add and remove custom overlays.
Unlike MAMapView, which requires returning an MAOverlayRenderer in the -mapView:rendererForOverlay: callback, AMapNaviDriveView requires an object that conforms to the <AMapNaviCompositeOverlay> protocol. For detailed usage, refer to the official Demo example: AMapNaviDriveView with a custom overlay.
/// Protocol for custom overlays on the navigation page. (since 6.7.0)
@protocol AMapNaviCompositeOverlay <MAOverlay>

@required

/// The overlay renderer used by the navigation SDK for drawing on the map.
/// The implementing object must assign a non-nil value to this property.
@property (nonatomic, strong, readonly) MAOverlayRenderer *overlayRender;

@optional

/// The overlay level. Refer to MAOverlayLevel. Default is MAOverlayLevelAboveRoads.
@property (nonatomic, assign, readonly) MAOverlayLevel overlayLevel;

@end
/**
* @brief Adds a custom overlay to the navigation map. (since 6.7.0)
* @param overlay An object conforming to the AMapNaviCompositeOverlay protocol.
* See the official Demo's DriveViewWithCustomOverlayViewController for reference.
*/
- (void)addCustomOverlay:(id <AMapNaviCompositeOverlay>_Nonnull)overlay;
/**
* @brief Removes a custom overlay from the navigation map. (since 6.7.0)
* @param overlay An object conforming to the AMapNaviCompositeOverlay protocol.
*/
- (void)removeCustomOverlay:(id <AMapNaviCompositeOverlay>_Nonnull)overlay;