Add a Map
This guide explains how to integrate and display a map in your Android application using the AMAP SDK. Before you begin, you must configure the necessary permissions in your AndroidManifest.xml file.
Before You Begin
Step 1: Configure AndroidManifest.xml
Declare Permissions
Add the following permissions to your AndroidManifest.xml file. These are required for the map SDK (including its search functionality) to operate correctly.
<!-- Allows the app to open network sockets -->
<uses-permission android:name="android.permission.INTERNET" />
<!-- Allows the app to access network state -->
<uses-permission android:name="android.permission.ACCESS_NETWORK_STATE" />
<!-- Allows the app to access Wi-Fi network information -->
<uses-permission android:name="android.permission.ACCESS_WIFI_STATE" />
<!-- Allows the app to access coarse location from cell towers or Wi-Fi hotspots -->
<uses-permission android:name="android.permission.ACCESS_COARSE_LOCATION" />
Set Your API Key
Inside the <application> tag, add the following <meta-data> element to configure your API key.
<meta-data android:name="com.amap.api.v2.apikey" android:value="key">
//Your AMAP Key
</meta-data>
* [Get your API key].
* [Learn how to obtain the required SHA1 and package name for key registration].
Step 2: Add the Map SDK to Your Project
In Eclipse
1. Create a libs folder in your project root.
2. Copy the map SDK JAR file (2D or 3D) and the search SDK JAR file into the libs folder.
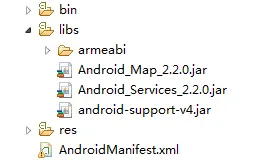
3. If you are using the 3D map SDK, also copy the native library folders (e.g., armeabi). The resulting project structure (using 3D SDK V2.2.0 as an example) should look like this:
In Android Studio
1. Add Native Libraries (.so files):
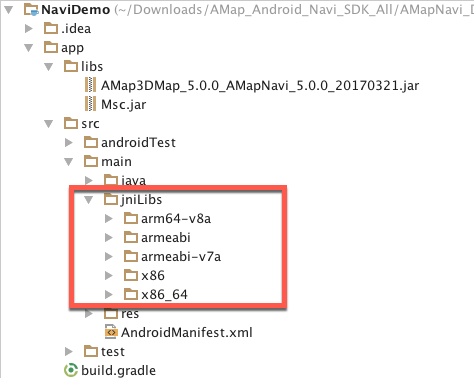
* Method 1 (Default): Create a jniLibs directory under src/main/. Copy the armeabi folder (or other relevant architecture folders) from the downloaded SDK into this directory. No changes to build.gradle are required.
* Method 2 (Custom): Copy the armeabi folder to the libs directory. Then, open your module-level build.gradle file and add the following configuration inside the android block: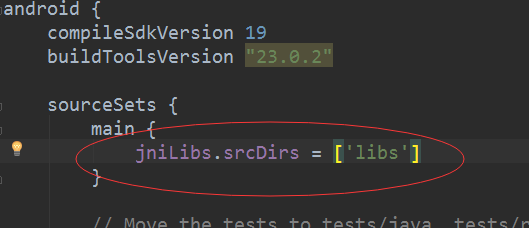
*(Image placeholder: Project structure with jniLibs)*
2. Add JAR Files:
* Copy the SDK JAR files into the libs directory.
* Right-click each JAR file and select Add As Library.
* Alternatively, go to File > Project Structure > Modules > Dependencies, click the green + icon, and select File dependency to add the JAR files. Your build.gradle file will be updated automatically.

* You can also use a wildcard to include all JAR files from the libs directory:

Step 3: Initialize the Map Container
MapView is a subclass of android.view.View that serves as a container for the map. You can use it in your layout just like any other Android View.
Add the MapView to Your Layout
Add the following XML to your layout file:
<com.amap.api.maps.MapView

    android:id="@+id/map"

    android:layout_width="match_parent"

    android:layout_height="match_parent"/>
Manage the Map Lifecycle
Properly managing the map lifecycle is crucial. The following example demonstrates how to handle the lifecycle callbacks in your Activity:
public class MainActivity extends Activity {
    MapView mMapView = null;

    @Override
    protected void onCreate(Bundle savedInstanceState) {
        super.onCreate(savedInstanceState);
        setContentView(R.layout.activity_main);

        // Get a reference to the MapView
        mMapView = (MapView) findViewById(R.id.map);

        // Create the map. This must be called in onCreate.
        mMapView.onCreate(savedInstanceState);
    }

    @Override
    protected void onDestroy() {
        super.onDestroy();
        // Destroy the map. This must be called in onDestroy.
        mMapView.onDestroy();
    }

    @Override
    protected void onResume() {
        super.onResume();
        // Resume the map rendering. This must be called in onResume.
        mMapView.onResume();
    }

    @Override
    protected void onPause() {
        super.onPause();
        // Pause the map rendering. This must be called in onPause.
        mMapView.onPause();
    }

    @Override
    protected void onSaveInstanceState(Bundle outState) {
        super.onSaveInstanceState(outState);
        // Save the current map state. This must be called in onSaveInstanceState.
        mMapView.onSaveInstanceState(outState);
    }
}
Common Map Containers
The map SDK provides six types of containers, built on two underlying OpenGL ES components: GLSurfaceView and TextureView.
* GLSurfaceView-based containers:
* MapView
* MapFragment
* SupportMapFragment
SupportMapFragment is a subclass of android.app.Fragment that simplifies lifecycle management and offers more flexible layout options compared to MapView.
* TextureView-based containers:
* TextureMapView
* TextureMapFragment
* TextureSupportMapFragment
Use TextureMapView or TextureSupportMapFragment when you need to overlay a map with other GLSurfaceView components (e.g., a camera preview) or load a map inside a ScrollView. This helps avoid common issues like view penetration or black screens during scrolling.
For detailed usage examples of all six containers, refer to the official sample code.
Step 4: Display the Map
The AMap class is the primary controller for the map. It provides methods for:
* Switching map layers (e.g., satellite, night mode).
* Changing the map state (rotation, tilt angle, center coordinate, zoom level).
* Adding markers, polylines, polygons, and circles.
* Handling user interactions (clicks, gestures).
After initializing the MapView, create an AMap object as follows:
// Get a reference to the MapView
mapView = (MapView) findViewById(R.id.map);
mapView.onCreate(savedInstanceState); // This method must be overridden to save the map's current state.

// Initialize the AMap controller
AMap aMap;
if (aMap == null) {
    aMap = mapView.getMap();
}
For examples of initializing AMap with other container types, see the official sample code.
Step 5: Enable the World Map and Configure English
To display the world map and switch the map language to English, use the following code:
// Show or hide the international map
public static void loadWorldVectorMap(boolean isLoad);

// Switch the map language to English
MapsInitializer.initRegionLanguageType(2);
Language Code Reference
The following table lists the supported language codes:
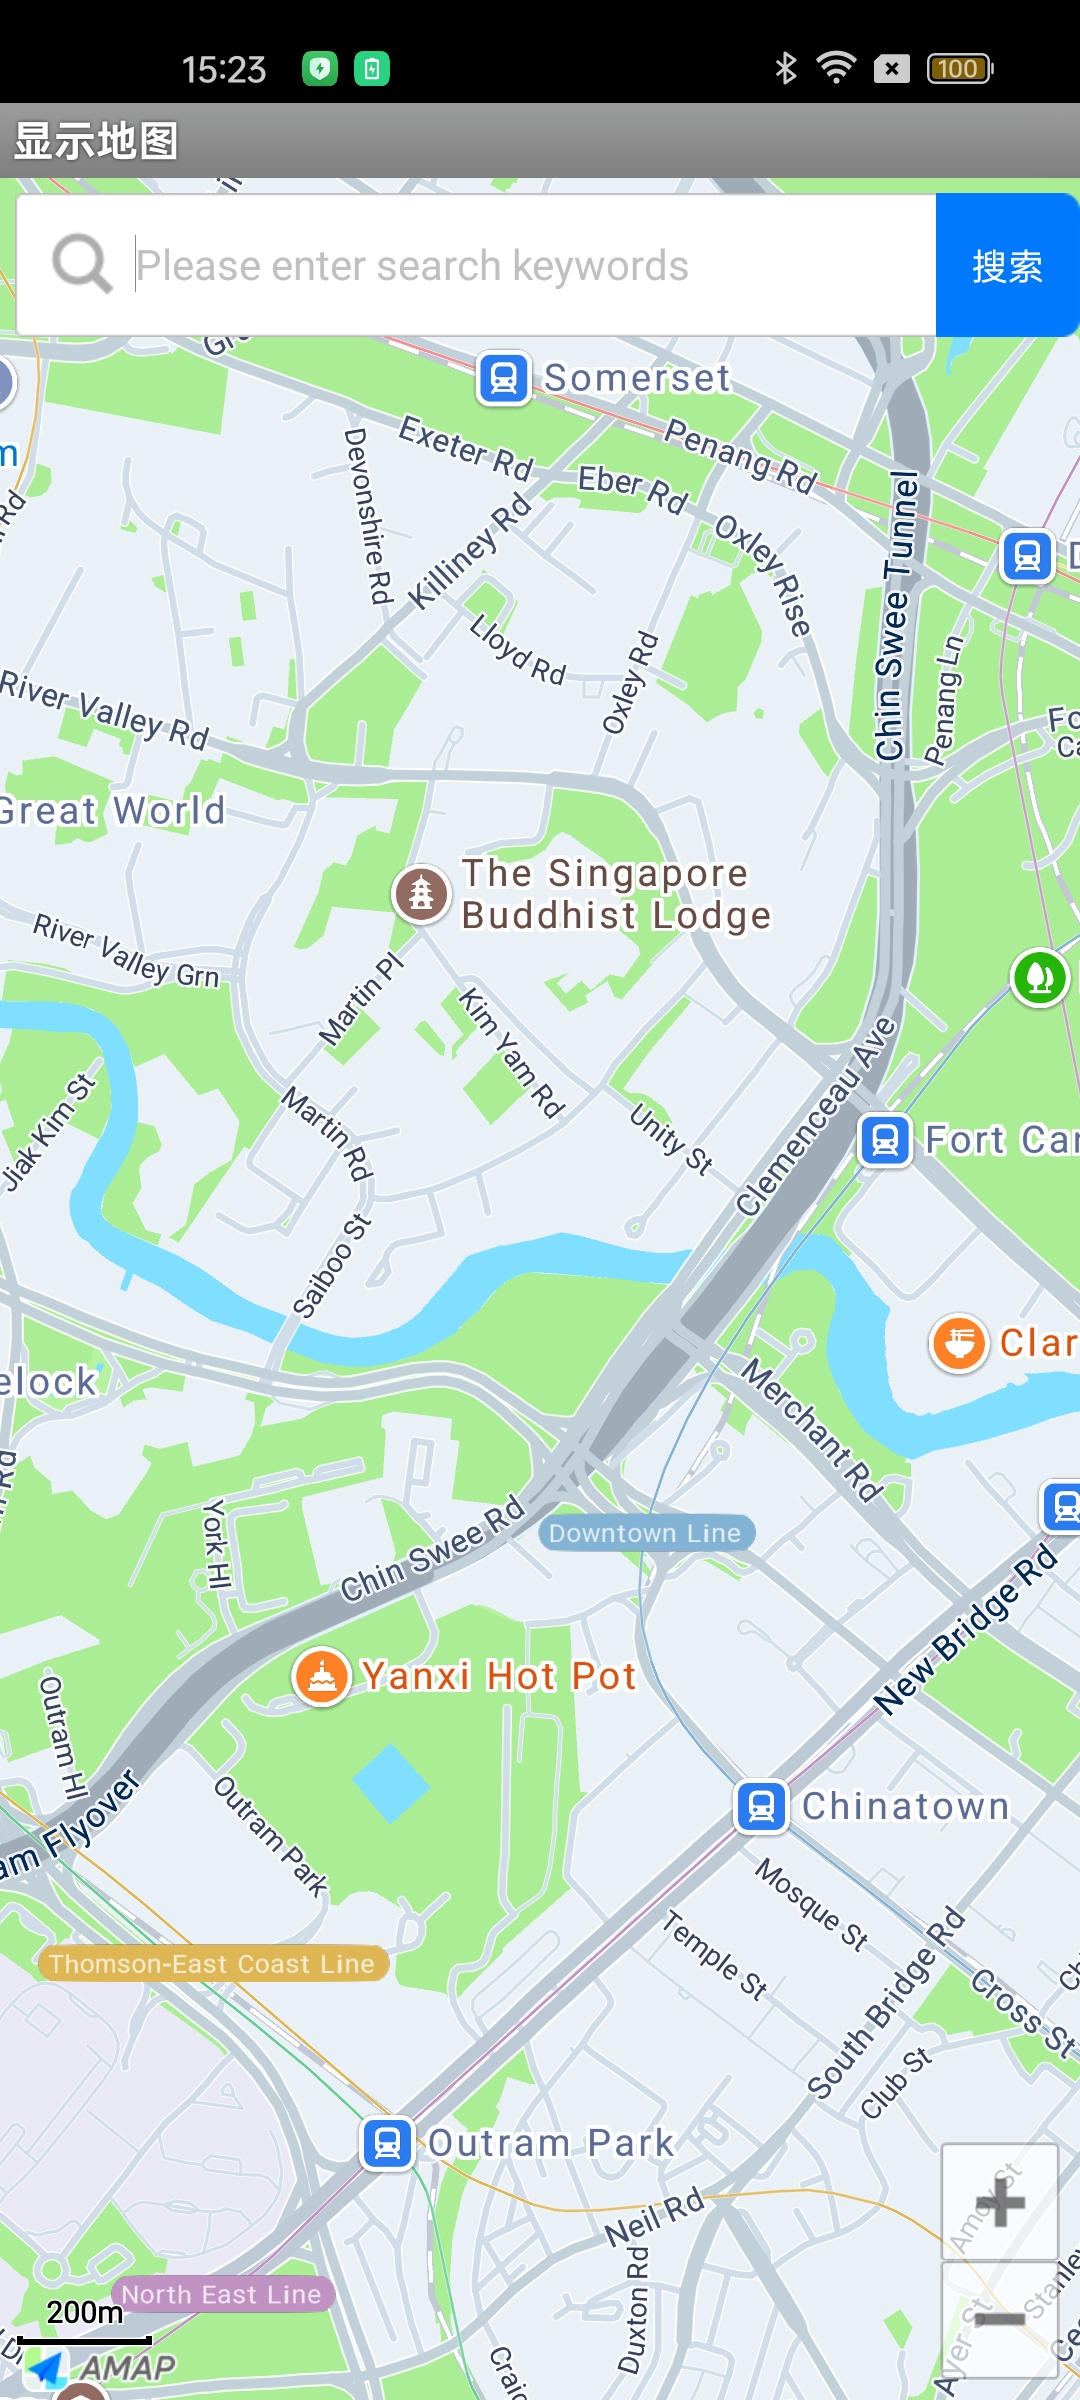
After completing these steps, run your application. You should see the AMAP displayed in your app, as shown below: