

Swift Guide
This document describes how to develop a map application using Swift 2.2 with the AMAP iOS SDK. The map SDK version is 4.1.0, and the search SDK version is 4.1.0.
The AMAP iOS SDK supports LBS application development using the Swift language. Our official demo includes Swift examples, and all sample code is implemented in the demo.
The following sections provide a brief overview of the development process.
Before you begin, make sure to apply for an API key. For details, see Get an API Key.
Get Started
Step 1: Create a new project
Create a new iOS project in Xcode.
Step 2: Configure the project
For project configuration instructions, see the "Create a Project" section in the Development Guide.
Step 3: Configure Swift
1. Create a bridging header file. Place it in your project directory. In this example, the file is named officialDemoSwift-Bridging-Header.h.
2. Import the required libraries in the bridging header file:
#import <AMapFoundationKit/AMapFoundationKit.h>
#import <AMapSearchKit/AMapSearchKit.h>
#import <MAMapKit/MAMapKit.h>
#import "APIKey.h"
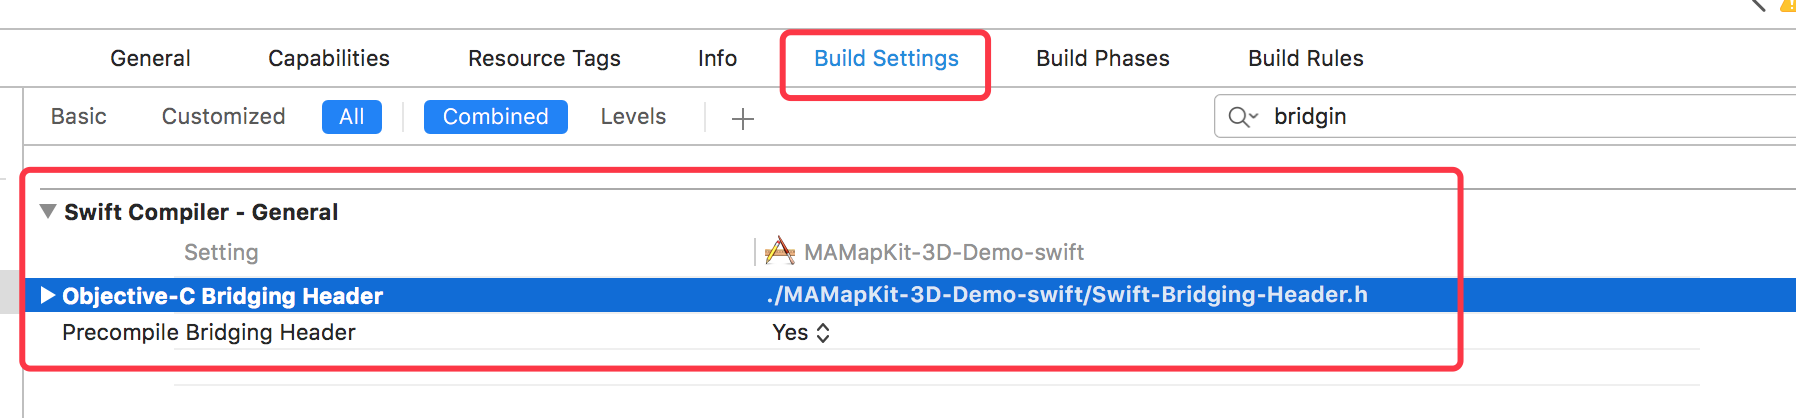
3. In the Xcode project navigator, select your project. Go to TARGETS > Build Settings > Swift Compiler - Code Generation > Objective-C Bridging Header, and enter the path to your bridging header file.
Display a Map
This section uses the 3D vector map SDK as an example.
In ViewController.swift, adopt the MAMapViewDelegate protocol. In the viewDidLoad method, configure the API key, initialize a MAMapView object, and add it as a subview.
var mapView: MAMapView!
var search: AMapSearchAPI!

override func viewDidLoad() {
    super.viewDidLoad()
    // Do any additional setup after loading the view, typically from a nib.
    self.title = "Swift Demo"

    AMapServices.sharedServices().apiKey = APIKey
    initMapView()
    initSearch()
}

override func viewDidAppear(animated: Bool) {
    super.viewDidAppear(animated)
    mapView.showsUserLocation = true
    mapView.userTrackingMode = MAUserTrackingMode.Follow
}

func initMapView() {
    mapView = MAMapView(frame: self.view.bounds)
    mapView.delegate = self
    self.view.addSubview(mapView!)
}

func initSearch() {
    search = AMapSearchAPI()
    search.delegate = self
}
Run the application. The map is displayed.
Perform a Reverse Geocoding Query
Reverse geocoding is one of the many services provided by AMAP and is widely used in iOS LBS applications. Implementing a reverse geocoding query requires the search library (AMapSearchKit.framework).
The search module provides the following implementation steps:
1. Initialize the main search object AMapSearchAPI and adopt the AMapSearchDelegate protocol.
2. Construct a request object and configure the search parameters.
3. Use the main search object to initiate a search with the request object as a parameter.
4. Implement the corresponding callback function in the search protocol. Parse the response object to obtain the search results.
The following scenario uses the device's current location to perform a reverse geocoding query when the user taps the location annotation (blue dot). The address is then displayed in a callout bubble.
To implement this scenario:
1. Enable location services and display the location annotation (blue dot).
2. Obtain the latitude and longitude of the current location in the location callback.
3. Tap the location annotation to perform a reverse geocoding query.
4. Set the title and subtitle of the location annotation in the reverse geocoding callback.
The complete code is as follows:
// Initiate a reverse geocoding request
func searchReGeocodeWithCoordinate(coordinate: CLLocationCoordinate2D!) {
    let regeo: AMapReGeocodeSearchRequest = AMapReGeocodeSearchRequest()
    regeo.location = AMapGeoPoint.locationWithLatitude(CGFloat(coordinate.latitude), longitude: CGFloat(coordinate.longitude))
    self.search!.AMapReGoecodeSearch(regeo)
}

// MARK:- MAMapViewDelegate
func mapView(mapView: MAMapView!, didLongPressedAtCoordinate coordinate: CLLocationCoordinate2D) {
    // Callback triggered by a long press on the map; performs a reverse geocoding query at the long-pressed point
    searchReGeocodeWithCoordinate(coordinate)
}

// MARK:- AMapSearchDelegate
func AMapSearchRequest(request: AnyObject!, didFailWithError error: NSError!) {
    print("request :\(request), error: \(error)")
}

// Reverse geocoding query callback
func onReGeocodeSearchDone(request: AMapReGeocodeSearchRequest, response: AMapReGeocodeSearchResponse) {
    print("response :\(response.formattedDescription())")

    if (response.regeocode != nil) {
        let coordinate = CLLocationCoordinate2DMake(Double(request.location.latitude), Double(request.location.longitude))

        let annotation = MAPointAnnotation()
        annotation.coordinate = coordinate
        annotation.title = response.regeocode.formattedAddress
        annotation.subtitle = response.regeocode.addressComponent.province
        mapView!.addAnnotation(annotation)
    }
}
This section introduced a simple LBS application developed with Swift and the AMAP iOS SDK. If you find Swift straightforward and direct, just do it.
For a Swift example, see MyRoute.
Both the 2D and 3D demos now include Swift examples. For example, in the 3D demo, select the target MAMapKit-3D-Demo-swift and run it to see the Swift demo in action.