

Shapes
This guide describes how to draw circles, heatmaps, image overlays, and tile layers on a map using the AMAP iOS SDK.
Draw a Circle
Use the MACircle class to draw a circle on the map. A circle is defined by its center coordinate (latitude and longitude) and radius (in meters).
Step 1: Create a Circle Object
In the viewDidLoad method of your view controller, construct a circle object using the center coordinate and radius.
// Construct a circle
MACircle *circle = [MACircle circleWithCenterCoordinate:CLLocationCoordinate2DMake(39.952136, 116.50095) radius:5000];

// Add the circle to the map
[_mapView addOverlay:circle];
Step 2: Implement the Renderer Callback
Implement the mapView:rendererForOverlay: method from the MAMapViewDelegate protocol to configure the circle's visual style.
- (MAOverlayRenderer *)mapView:(MAMapView *)mapView rendererForOverlay:(id <MAOverlay>)overlay
{
    if ([overlay isKindOfClass:[MACircle class]])
    {
        MACircleRenderer *circleRenderer = [[MACircleRenderer alloc] initWithCircle:overlay];

        circleRenderer.lineWidth    = 5.f;
        circleRenderer.strokeColor  = [UIColor colorWithRed:0.6 green:0.6 blue:0.6 alpha:0.8];
        circleRenderer.fillColor    = [UIColor colorWithRed:1.0 green:0.8 blue:0.0 alpha:0.8];
        return circleRenderer;
    }
    return nil;
}
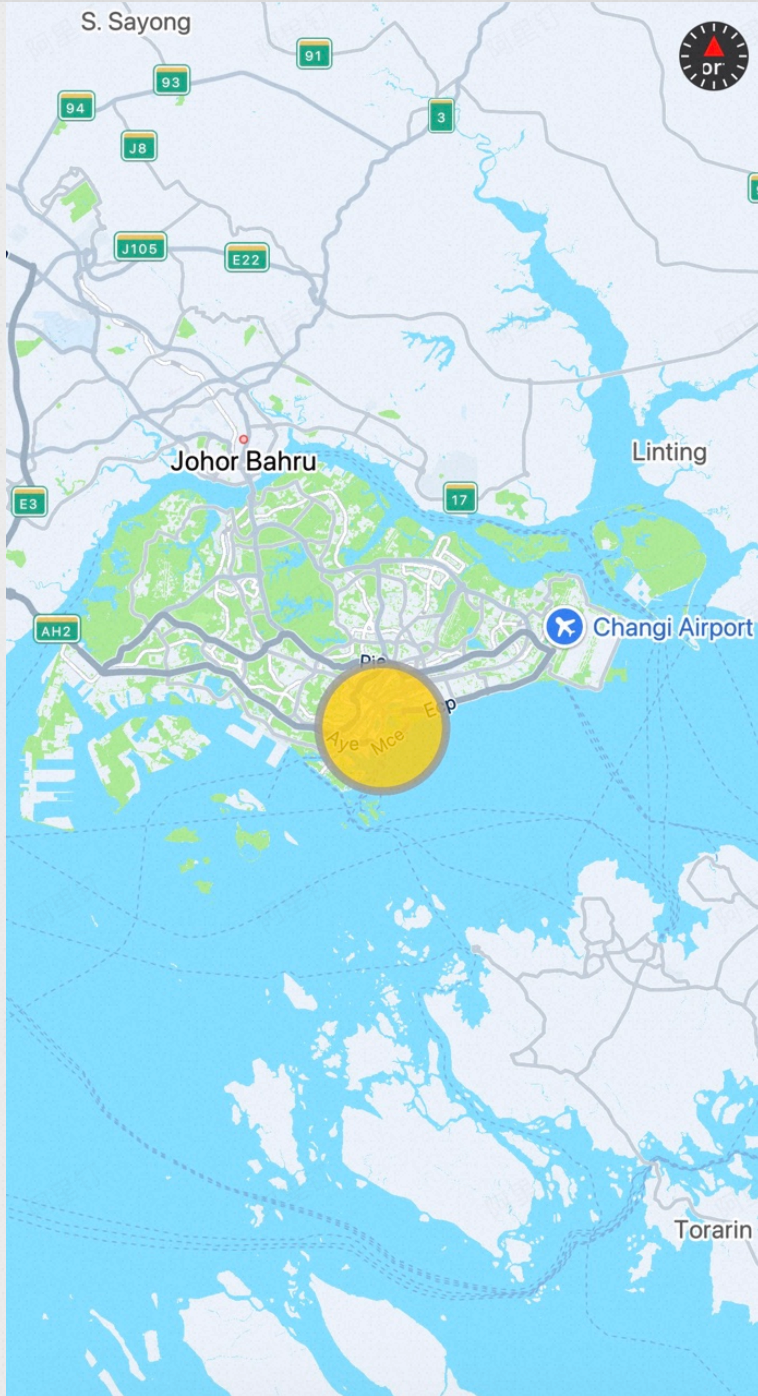
Result
The following image shows the circle rendered on the map:
Draw a Heatmap
A heatmap is a layer that uses color gradients to visualize the distribution of data points. The AMAP iOS SDK supports heatmap layers starting from version V2.6.0.
Step 1: Create a Heatmap Tile Overlay Object
Construct a MAHeatMapTileOverlay object.
Step 2: Configure Heatmap Parameters
The following table describes the configurable parameters for the heatmap layer.
Step 3: Add the Heatmap to the Map
Add the MAHeatMapTileOverlay object to the MAMapView.
Step 4: Implement the Renderer Callback
Implement the mapView:rendererForOverlay: method from the MAMapViewDelegate protocol to display the heatmap on the map.
Code Example
The following example reads heatmap data from a locations.json file (you can also fetch this data from a remote server).
// Construct the heatmap tile overlay object
MAHeatMapTileOverlay *heatMapTileOverlay = [[MAHeatMapTileOverlay alloc] init];

// Construct heatmap data from locations.json
NSMutableArray *data = [NSMutableArray array];

NSData *jsdata = [NSData dataWithContentsOfFile:[[NSBundle mainBundle] pathForResource:@"locations" ofType:@"json"]];

@autoreleasepool {
    if (jsdata) {
        NSArray *dicArray = [NSJSONSerialization JSONObjectWithData:jsdata options:NSJSONReadingAllowFragments error:nil];

        for (NSDictionary *dic in dicArray) {
            MAHeatMapNode *node = [[MAHeatMapNode alloc] init];
            CLLocationCoordinate2D coordinate;
            coordinate.latitude = [dic[@"lat"] doubleValue];
            coordinate.longitude = [dic[@"lng"] doubleValue];
            node.coordinate = coordinate;

            node.intensity = 1; // Set weight
            [data addObject:node];
        }
    }
    heatMapTileOverlay.data = data;
}

// Construct the gradient object
MAHeatMapGradient *gradient = [[MAHeatMapGradient alloc] initWithColor:@[[UIColor blueColor], [UIColor greenColor], [UIColor redColor]] andWithStartPoints:@[@(0.2), @(0.5), @(0.9)]];
heatMapTileOverlay.gradient = gradient;

// Add the heatmap to the map
[_mapView addOverlay:heatMapTileOverlay];
Implement the mapView:rendererForOverlay: method to display the heatmap.
- (MAOverlayRenderer *)mapView:(MAMapView *)mapView rendererForOverlay:(id <MAOverlay>)overlay
{
    if ([overlay isKindOfClass:[MATileOverlay class]])
    {
        MATileOverlayRenderer *tileOverlayRenderer = [[MATileOverlayRenderer alloc] initWithTileOverlay:overlay];

        return tileOverlayRenderer;
    }

    return nil;
}
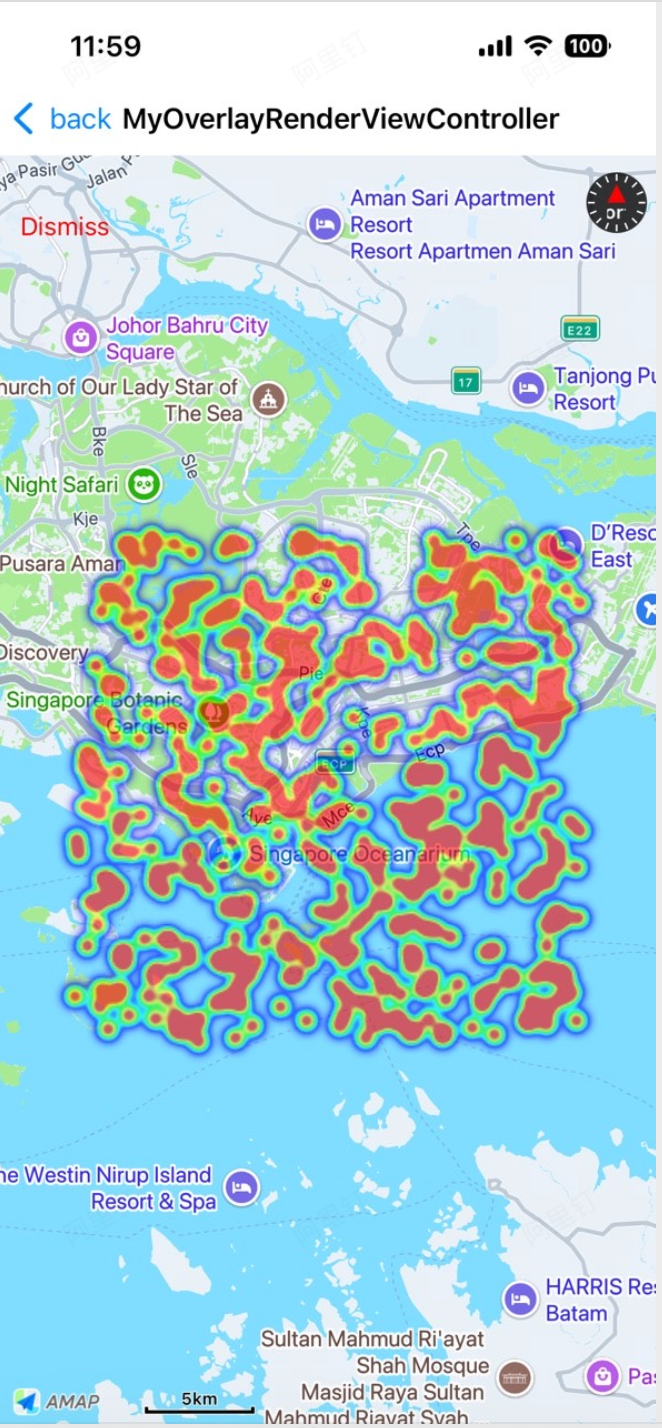
The operation effect is as follows:
Draw an Image Overlay
Use the MAGroundOverlay class to place an image at a specified location on the map, scaled to fit the given bounds.
Step 1: Create an Image Overlay Object
In the viewDidLoad method, construct a ground overlay using bounds and an image.
- (void) viewDidLoad
{
    MACoordinateBounds coordinateBounds = MACoordinateBoundsMake(CLLocationCoordinate2DMake(39.939577, 116.388331), CLLocationCoordinate2DMake(39.935029, 116.384377));

    MAGroundOverlay *groundOverlay = [MAGroundOverlay groundOverlayWithBounds:coordinateBounds icon:[UIImage imageNamed:@"GWF"]];

    [_mapView addOverlay:groundOverlay];
    _mapView.visibleMapRect = groundOverlay.boundingMapRect;
}
Step 2: Implement the Renderer Callback
Implement the mapView:rendererForOverlay: method to display the image overlay.
- (MAOverlayRenderer *)mapView:(MAMapView *)mapView rendererForOverlay:(id <MAOverlay>)overlay
{
    if ([overlay isKindOfClass:[MAGroundOverlay class]])
    {
        MAGroundOverlayRenderer *groundOverlayRenderer = [[MAGroundOverlayRenderer alloc] initWithGroundOverlay:overlay];
        return groundOverlayRenderer;
    }
    return nil;
}
The operation effect is as follows:

Draw a Tile Layer
Tile layers allow you to add additional features to the base map, such as indoor information for a shopping mall or details for a scenic area. The MATileOverlay class defines a collection of images that can be added to the base map.
Prerequisite: You must generate tiles using the spherical Mercator projection and deploy them on your server in the expected format.
Step 1: Create a Tile Overlay Object
Create a MATileOverlay object using a URL template that points to the tile images.
Step 2: Set Visibility Zoom Levels
Set the minimum and maximum zoom levels for which the tile overlay is visible.
Step 3: Define the Renderable Region
Set the region of the map where the tile overlay should be rendered.
Step 4: Add the Tile Overlay to the Map
Add the MATileOverlay object to the MAMapView.
Code Example
The following example uses pre-prepared tile data deployed on a test server.
#define kTileOverlayRemoteServerTemplate @"http://cache1.arcgisonline.cn/arcgis/rest/services/ChinaCities_Community_BaseMap_ENG/BeiJing_Community_BaseMap_ENG/MapServer/tile/{z}/{y}/{x}"
#define kTileOverlayRemoteMinZ      4
#define kTileOverlayRemoteMaxZ      17
#define kTileOverlayLocalMinZ       11
#define kTileOverlayLocalMaxZ       13

- (MATileOverlay *)constructTileOverlayWithType:(NSInteger)type
{
    MATileOverlay *tileOverlay = nil;
    if (type == 0)
    {
        tileOverlay = [[LocalTileOverlay alloc] init];
        tileOverlay.minimumZ = kTileOverlayLocalMinZ;
        tileOverlay.maximumZ = kTileOverlayLocalMaxZ;
    }
    else
    {
        tileOverlay = [[MATileOverlay alloc] initWithURLTemplate:kTileOverlayRemoteServerTemplate];
        tileOverlay.minimumZ = kTileOverlayRemoteMinZ;
        tileOverlay.maximumZ = kTileOverlayRemoteMaxZ;
        tileOverlay.boundingMapRect = MAMapRectWorld;
    }
    return tileOverlay;
}
Step 5: Implement the Renderer Callback
Implement the mapView:rendererForOverlay: method to display the tile layer.
- (MAOverlayRenderer *)mapView:(MAMapView *)mapView rendererForOverlay:(id <MAOverlay>)overlay
{
    if ([overlay isKindOfClass:[MATileOverlay class]])
    {
        MATileOverlayRenderer *renderer = [[MATileOverlayRenderer alloc] initWithTileOverlay:overlay];
        return renderer;
    }
    return nil;
}
The operation effect is as follows:
