

Set Up with CocoaPods
Auto deployment saves you the time of manually configuring your project, allowing you to build your application more efficiently. The auto deployment setup process is covered in detail in the Getting Started guide. This page highlights key considerations and important notes.
Install CocoaPods
1. Upgrade gem
An outdated gem version may cause installation or upgrade failures. Run the following command to upgrade gem:
sudo gem update --system2. Install CocoaPods
Check your OS X version.
If your OS X version is 10.11 or earlier, run the following commands to install CocoaPods:
sudo gem install cocoapods
pod setup
If your OS X version is later than 10.11, use the following commands:
sudo gem install -n /usr/local/bin cocoapods
pod setup
Note: The installation process may take a long time and can fail due to network conditions. You may need to try multiple times until it succeeds.
Install the SDK Using CocoaPods
1. Create a Podfile
Create a file named Podfile in the same folder as your project file (.xcodeproj). If you haven't created an Xcode project yet, create one and save it to your local computer. The Podfile content is shown below (using the 3D Map SDK as an example; refer to the table below for other SDK pod names):
platform :ios, '7.0' # System version
target 'YourProjectTarget' do # Project name
     pod 'AMap3DMap'  # 3D Map SDK
end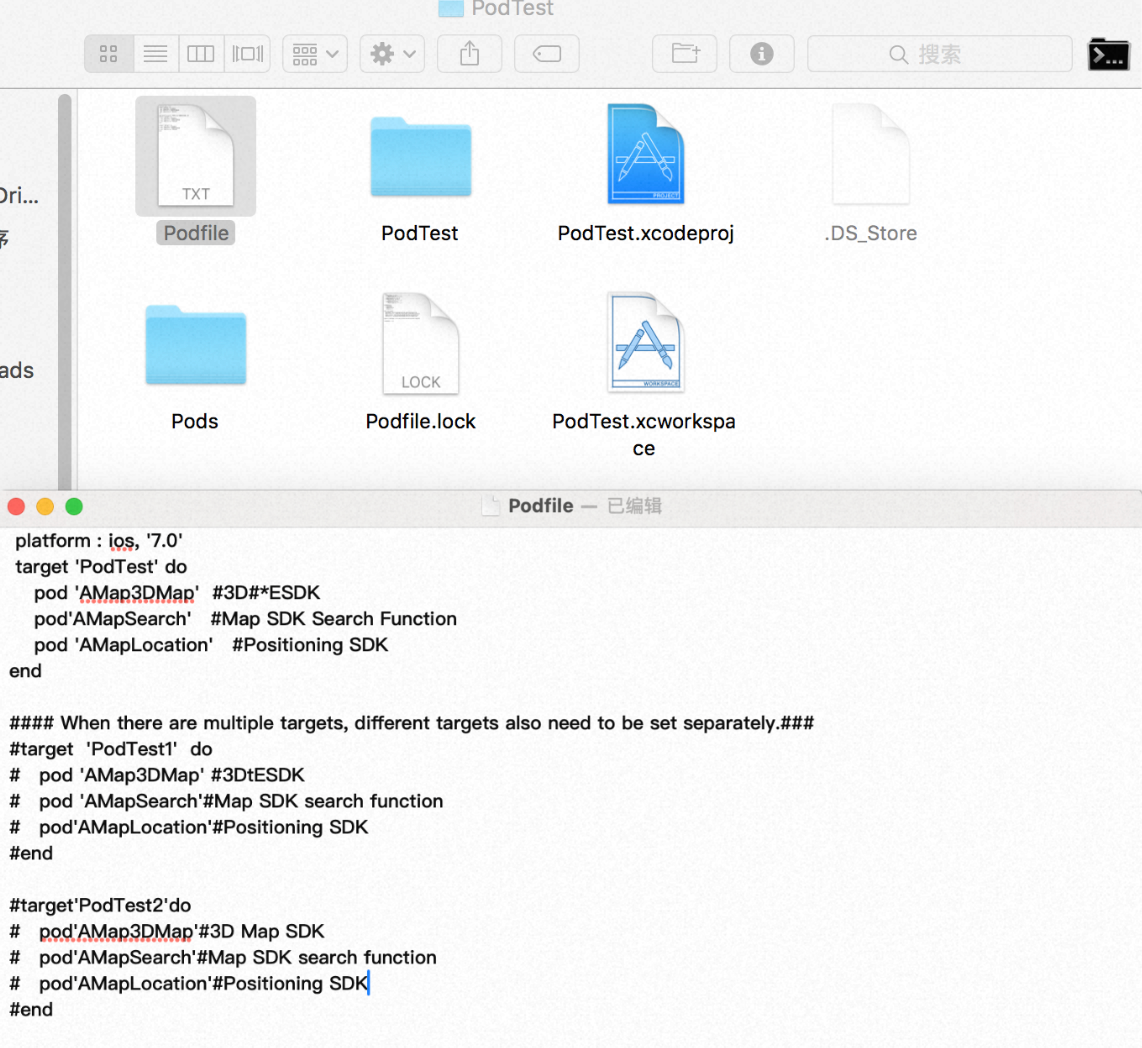
AMAP iOS SDK Pod Names
2. Configure and Install the SDK
Run the following commands to configure and install the SDK:
pod repo update  # Ensures the local map-related SDK is up to date
pod install
Note: The pod 'AMapLocation' command also imports the Foundation SDK, which affects App Store submission.Click here to learn more about the Foundation SDK.
3. Open the Project
After the command completes successfully, a .xcworkspace file is generated. Open the .xcworkspace file to launch your project. Important: Do not open the .xcodeproj file at the same time.

Upgrade the SDK
If you have already installed the AMAP iOS Map SDK and want to update to the latest version, run the following commands in the directory containing your Podfile:
pod repo update # Ensures the local map-related SDK is up to date
pod update
Note: The pod update command also updates the Foundation SDK, which affects App Store submission. Click here to learn more about the Foundation SDK.
Specify an SDK Version
To use a specific version of the SDK, modify your Podfile to include the version number. For example:
platform :ios, '7.0' # System version
target 'YourProjectTarget' do  # Project name
   pod 'AMap3DMap', '~>4.4.1' # Specify the version here
end
Then run the following commands:
pod repo update # Ensures the local map-related SDK is up to date
pod install